Why the Type of Foot You Use Is Critical When Sewing Leather
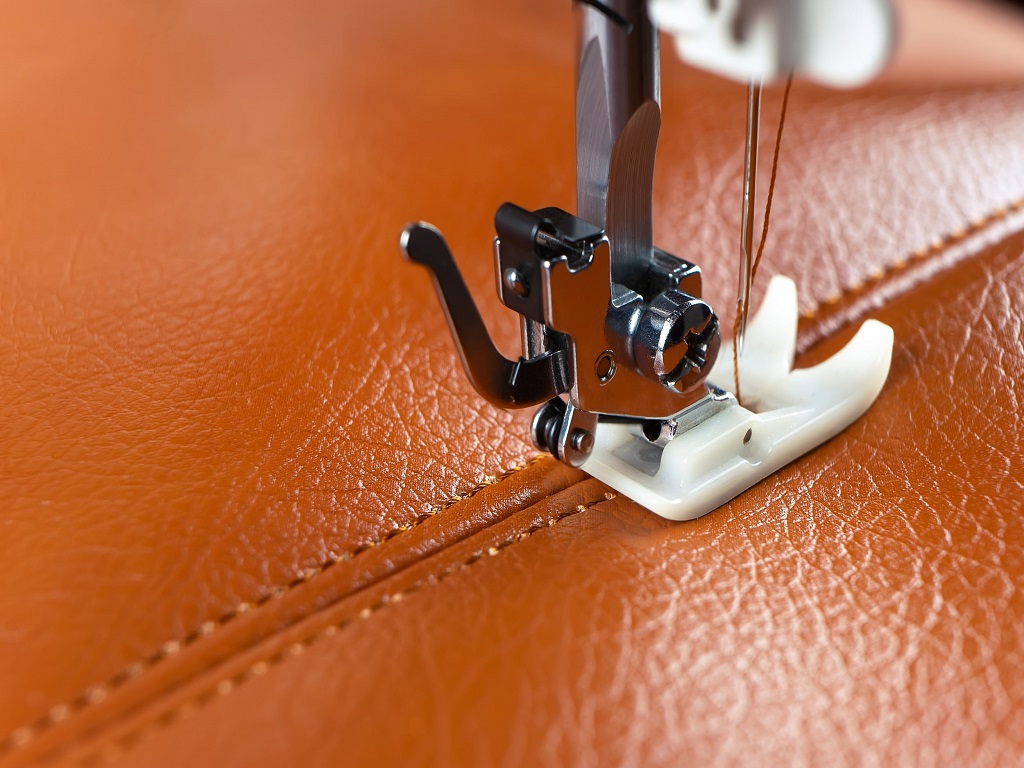
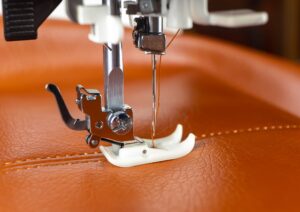
Threads, needles, feed dogs and leather behave very differently to cotton or linen. It is very thick and obstinate and likes to slide. Standard presser feet, or all-purpose, stick, drag or simply leave unsightly marks. There come the specialty leather sewing foot which is made to work with leather.
Stop-and-Go Projects: The Teflon (Non-Stick) Foot
Have you ever driven through ice? That is the kind of feeling which a common metal foot leaves on leather. The Teflon foot glides rather than sticks enabling your leather to ride much more easily with a tremendous reduction in friction. It is sworn by quilters and bag-makers, particularly where medium grades to heavy cowhide is to be used. Ideal to use with wallets, bags and strong belts.
Pros: Does a great job of reducing drag.
Negatives: Poor close corners, small detail work.
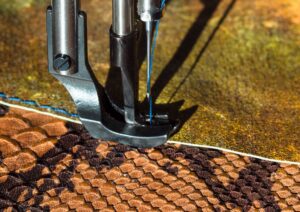
The Roller Foot: Conquering Texture and Grain
And this is a foot that fulfils its name. Leather sewing has an enemy, friction. The roller foot, studded with minute steel rollers actually rolls over your leather. On rough, pebbled, or stamped leathers of any description, and on all stamped leathers, these small wheels avert irregular feeding. Consider knitted purses, jackets made of leather or strings which are machine stitched.
Ultimate choice: Soft or pebbled leathers, irregular shaped panels.
Careful: Occasionally can punch the leather, judge first before jumping feet first into your ultimate work.
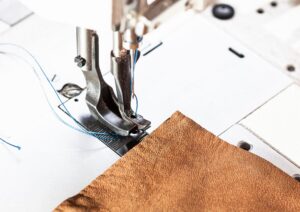
Walking Foot (Even Feed Foot): Bulky Layer Power:
Strength is wanted in thick hides, in stacked seams, or where there is a lining to be done. A walking foot gets the leather by the top and bottom as a team and drags it all along. This reduces skipped stitches so much. It is an oath of home upholstery and wallet makers.
Application: In case of saddle bags, heavy duty belts and seat covers with more than two layers.
Warning: These are feet that can be rather noisy–and they go a little bit slower.
THE UNsung Heroes of Adjusting Pressure and Feed
Ok, enough about press setting, now lets talk of one of the items people seem to pay little attention to press foot pressure and feed dog adjustment. These places will change your sewing into something like that moving it on the level of amateur work up to the one where people say that you purchased it in such a big shop.
Presser Foot Pressure: Do not Smoosh the Leather
The majority of sewing machines permit you to choose the level of the foot down pressure. At too much a pressure? Your leather expands, comes dotted, even creased. Too little? The leather does not progress and thread gets lumpy or irregular.
Trick: Work at low pressure. Turn up slowly till you observe straight and even stitches. Certain types of leathers, such as lamb or goat, may just require the most minimal touch.
Feed Dog Settings: Regulate the March
Feed dogs–the spackly parts beneath your fabric- regulate passage of leather through. Leather can be puckered or perforated using short small stitches. In most projects, a longer stitch length (3.0-3.5mm) avoids tearing and it provides a classic professional look.
Test it this way: stitch in parallel lines on test scraps. Set feed so that the top and bottom layers feed in unison. When your stitches are perfect then you are on the money.
Combination Foot and Machine Set: Seat-of-the-Pants Set-ups:
Now let us pull all this together.
Leather Tote Bag making
And you are piecing up a series of panels of heavy, oil-tanned hide. Select a walking foot and reduce pressure on the presser feet. Adjust your stitch length to 3.5mms. See those seams lie flat with no moveable layers. No more inch by inch battles with the machine!
Sewing a slim Leather Wallet
Soft lambskin? Walk on a Teflon foot and pressure less than two. Place your leather on tissue paper to make it not stretch then stitch on with a longer stitch. Leaves a residue free tissue tear and the stitches come out beautiful and clean. Nothing puckered up, nothing torn.
Folding Leather Stitching
Leather can however hand out zingers even when you have all the right gear. What to do in case of things gone south:
Getting skipped stitches? Use a bit finer, leathery needle or replace with a walking foot.
Stitches uneven? Change the length of stitches or foot pressure.
Impressions on the layer above? Before sewing dab a bit of sewing machine oil on the foot of the sewing machine or wipe over the foot with some scrap of material.
Tips on Maintenance: Everything has to be in the Best Condition
Leather sheds, dyes rub off and even the finest machines get gunked. Wash the bottom of your sewing feet and clean after each project. Sticky residue can be cleaned with a little of rubbing alcohol. Instead of sharpening needles, replace them after each large project- there is no use in having dull needles that result in skipped stitches.
Choices of Feet used in Decorative Purposes
Decorative stitches on leather (edge stitching, top-stitching and even embroidery) should not be discounted. With decorative edging you may find that an edge-stitch foot will assist you to stay on an even, straight line when stitching at the edge of a pocket or a strap. A Teflon or roller foot is recommended on suede or softer finishes although a decorative stitch needle will give the best result.
Never attempt to work rapid on a thick or stiff leather. One can bend needles or worse yet at the finish line the thread can be snapped by rushing.
The best foot does show the best foot requires a bit of trial and error at other times. Start getting into the practice of sewing testing strips first prior to beginning your actual project. Foot choice variety. Adjust the pressure, stitch length or even the type of the thread. Minor adjustments can give great outcomes.
Perfecting the technique of sewing up a piece of leather is not magic, it is information, experience, correct leather sewing foot and a little bit of tolerance. By using these tactics and adjustments, you will be able to conquer the most difficult looking hides and you will consistently have good looking strong stitches with each fabric. Happy sewing!