Techniques to Use of Multiple Layers of Leather
Have you ever borne the needles through a pile of leather and you think, Does my arm have to fall off? And then you are in excellent company. A thick leather sewing machine is something like working with a stubborn bull in tangoing. You require time, proper equipment, and strategy. Slip-ups are huge when you fight with compact hides or various layers. However, through a little number of effective tricks and a pinch of humor, harsh leather work may turn out really pleasing.

Prep Work: Leather, Equipment and Work Space
Searching setup We should discuss setup before we even thread the machine. It is the warm up to the game your project needs. Good planning clears up an entire set of obstacles off the road.
Leather Type: Hard, vegetable tanned hides are more durable than soft flexible pieces to run needles through. With a multi-layer project (belts, saddlebags, sheaths), what is the fattest piece you are going to wrestle with?
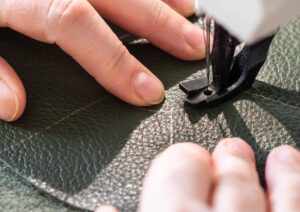
Matching Needles: That cannot be over-emphasized. Thick leather is cut with a wedge or diamond-point needle. Ordinary needles will bend, break or buckle causing errant stitching and sharp edges.
Threads: Bonded nylon or polyester should be used. The threads are heavy duty ones and they will not break in the middle of the seam. Thread can slide easier as well, though do not use cotton; it is moisture absorbent and stretches.
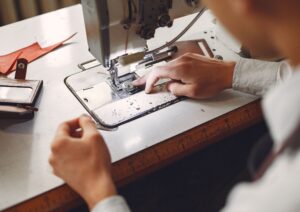
Working space: Place clamps in the pieces of leather. In case of movement of the hides in the process of sewing, all the subsequent stitches will be skewed.
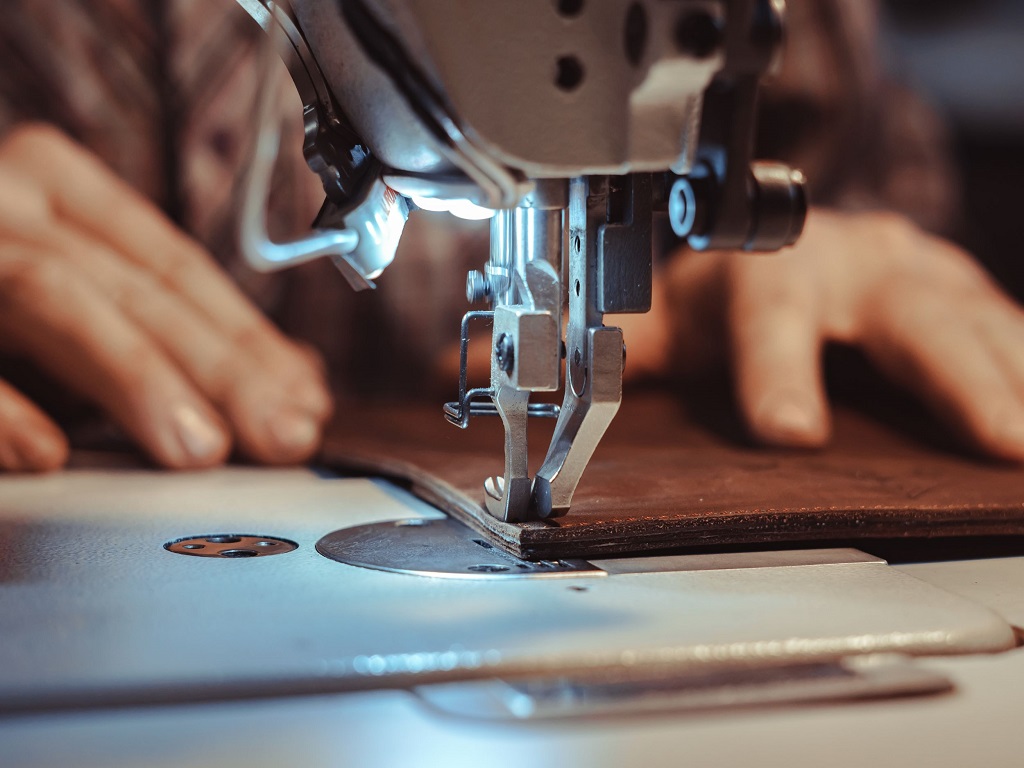
Introduction to thick leather sewing machine set up
Heavy leather sewing machines are not heavily-toned-up versions of their pitiable sibling; they have a rule or two of their own.
Presser Foot Height: An increased presser foot height allows you to easily slip on thick stacks.
Walking Foot or Compound Feed: Each of these feet will move the leather and the thread together as you sew so jams and slips are impossible.
I Hope You are Going Slow: You want to go fast, but not in this case. Reduce the speed and hear the machine–weird sounds are telling the you something is wrong.
Tension Tweaking: It is all about finding the balance. Too tight and your top stitches pucker or snap. Too slack, and the loops come in at the bottom. Test to scraps before you start in with the real thing.
Stacking Leather: Patenting Honest Layers
Using more than one layer, it is akin to having to wrestle with the squid. Leather glue will be your best friend, as it decreases slide during stitching. Just don t glue too excessively it will just gum up your equipment or ensure that the leather at the seam is hard.
Pins pale in this regard as compared to clips. The pins used are traditional and they create ugly holes and all attempts at pushing the pin through thick leather results in a grouchy crafter. Layers are aligned without disintegration by using small binder clips or speciality leather clips.
Ordinary Troubles and City remedies
Loss of threads through breakage and breakage of needles
Symptom: Thread shreds, snaps or bird-nests under. Needles are broken or bent.
Fix: 1) Ensure that you are using heavy-duty needle (size 18/110 or more). Shorter the machine to make sure it is not catching. Should this prove unsatisfactory, go to a coarser thread–find 69 weight, or coarser. Apply some beeswax on the thread so that it might pass easily.
Skipped Stitches
Symptom: the needle goes through, yet the stitch fails to take shape.
Fix: See your needle; it can be dull or a bit bent. At the machine permits and if you want to have a bit more penetration due to engine power, then make some more needle penetration by changing needle depth. CRANK HAND-Should you have already done all your work with the equipment, work through the super-tough places with a hand-crank.
Problem in Feeding of Layers
Symptom: There is difficulty with the presser foot or the feed dogs and this results in uneven size of the stitches or bunched up areas of leather.
Fix: A low-set foot is one of the problems with your machines, apply a roller foot or walking foot. When thickness is a bugbear, for half an hour put the foot higher erect one end of a scrap-leather wedge in the rear (“hump-jumper”). This evens out the presser foot and is not prone to stalling. Otherwise, when nothing can turn easily, then give a gentle push around the back-side as you sew.
Issues and Stitch Holes Marking
Holes are lined up oddly or are rough. Symptom
Fix: A hole may be pre-punched using a stitching chisel so that the edge can be hand stitched or pre-marked using a wheel. On machines, do mark out your stitch line with ruler and silver leather pen to get the right path. Plain pencils are worse than useless, their marks will not come out.
Tricky corners and curves Navigating Tricky Corners and Curves
Caveat Slow and Steady
Once you are going around a corner with more than one layer work you take your time: one stitch at a time. Turn your needle off, raise presser foot then pivot your leather and continue. In case of a tight turn, make your stitch shorter. This makes rounded edges more neater.
Stress Enhancement
Look out for a place where there would be strain (bike seats, weight bearing straps, bag handles)? Put in one or two backstitches at each end of the seam you have. Why, or, better, for safety stitch those seal points across and across with a saddle stitch by hand.
Problem Solving Thickness Leather
Thinners or Splitters are used.
When the stack is as thick as your machine will go along with, simply skive the seam allowance (a sharp knife or a leather splitter), and then sew it. This makes the overlap easier to deal with and the end project look neater- useful when working with wallet or clutch edges.
Needle Heating
Accumulating friction causes heating of needles making it possible to melt synthetic fibers, produce extraneous marks, or even glue up layer deposits. Suppose you stop at every foot of sewing, and wipe the needle first with machine oil, to make it cool.